When it comes to winter maintenance of the sidewalks and parking lots for your community facilities, ice melt can be a valuable tool when used correctly. Make sure you’re getting the most out of your ice melt with these tips.
How Do You Use Ice Melt?
Ice melt must be applied directly to the concrete walking surface to be effective, typically after shoveling or plowing. Don’t use ice melt to simply melt snow or ice when mechanical removal is possible—it’s a waste of product and it may not melt the truly icy areas where slips are most likely.
Storm in the forecast? Get ahead of the weather and preapply a liquid ice melt product (brine) before precipitation begins to prevent ice and snow from bonding to the surface. That will make it easier to remove later.
If pre-storm application isn’t possible, make sure you clear the snow before applying the ice melt to ensure it actually makes contact with the walking surface. If possible, skip the shoveling and use ergonomically friendly snow removal methods such as plows, blowers and power brushes.
Where Should I Apply Ice Melt?
Know which walking surfaces are high risk (e.g., often icy, prone to black ice, located in the shade) and plan to make their treatment a priority. You’ll also want to prioritize high-traffic areas and check them throughout the day.
How Much Ice Melt Should I Use?
According to manufacturers, less is usually more when it comes to ice melt. Applying too much can actually be counterproductive when the extra product is tracked inside on shoes, creating a slippery residue on floors and damaging carpeting.
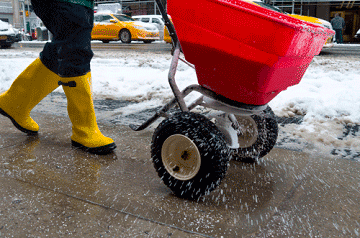
Help control your application by using handheld fertilizer spreaders for small areas and walk-behind spreaders for large areas. Colored ice melt can also give you a visual indication of how much has been put down.
Is Ice Melt Bad for Concrete?
Ice melt is not recommended for new concrete less than a year old, or on porous walkway surfaces such as brick. Before using ice melt, consider applying a sealer to help prevent concrete damage. Sealed concrete also requires less ice melt.
What is the Most Effective Kind of Ice Melt?
The best ice melt product for you depends on a variety of factors, including expected temperatures, surface materials and the need to protect any vegetation.
Rock salt (sodium chloride) is by far the least expensive option but it is only effective down to 15°F. Magnesium and calcium chloride products are very effective at lower temperatures, but are more expensive. Products with a high concentration of calcium chloride are more likely to leave a slippery, oily residue when tracked inside. Magnesium chloride produces less residue and is generally safer for vegetation.
Don’t limit your slip-prevention tools to just ice melt. In most cases, application of a traction aid (e.g., coarse sand, poultry grit or oil absorbent) can be a helpful treatment for icy surfaces, especially during thaw/refreeze conditions.
How Do I Keep Ice Melt Outside?
Once the ice melt has done its job, remove the slushy layer to help reduce tracked-in ice melt residue. Place mats both inside and outside all entrances to absorb liquid and remove contaminants from shoes. Additional walk-off mats are likely needed during snowy weather. Hard surface floors should be mopped as needed throughout the day, and mats should be replaced when they become saturated.
Should I Reapply Ice Melt?
Melted snow and ice can refreeze overnight, or even during the day depending on sun exposure, creating slippery and hard-to-see patches of black ice. Inspect walkways before the day’s foot traffic begins so you can treat slippery spots with ice melt or traction aids.
Mark especially dangerous spots with cones or signs. Be sure to adjust sensors and timers on exterior lights during winter months to ensure adequate illumination of outdoor walking surfaces.
Find More Online
Get in touch
Need help? We’re here for you! Whether you have questions or need personalized assistance, your local office is ready to support you.
Loss Control Insights
Stay informed with the latest news and receive actionable safety tips, all carefully curated by our team of experts.